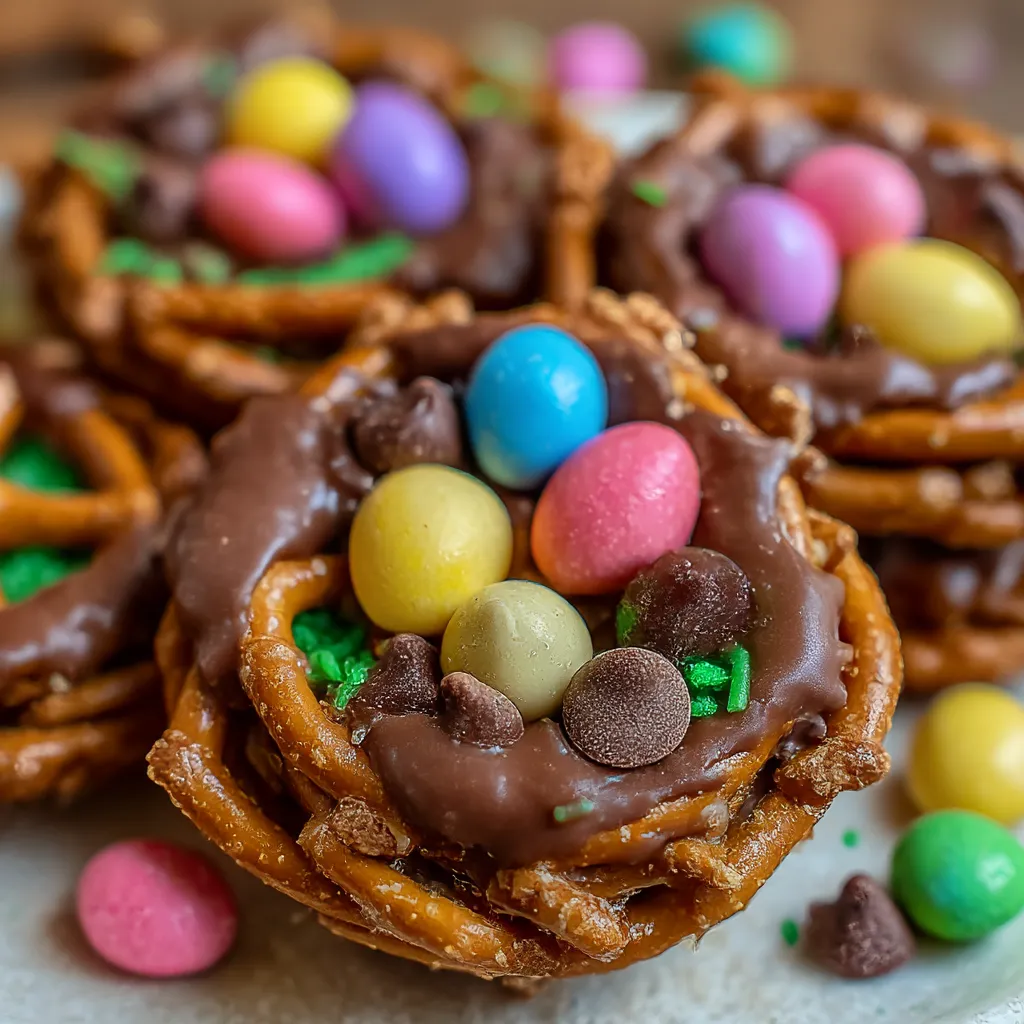
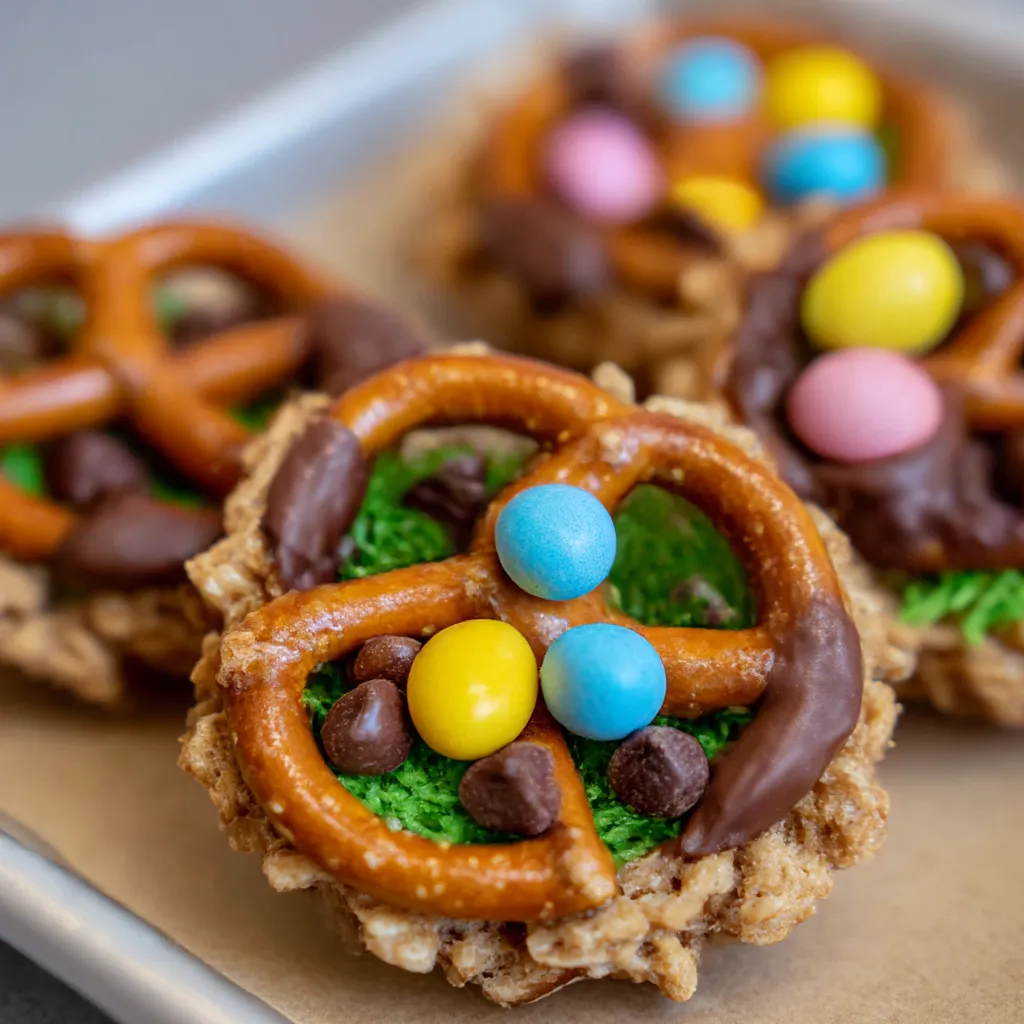
Chocolate Covered Pretzel Nests have a place on my kitchen counter whenever I need a quick, playful treat that looks as good as it tastes. As a chef who builds meal-prep plans for busy families and professionals, I know the clock is always ticking. This no-bake dessert comes together in minutes, letting you bypass the stove without sacrificing flavor or charm. The salty crunch of pretzels pairs with glossy chocolate to create edible nests, perfect for Easter, spring gatherings, or a simple weeknight surprise for kids and colleagues. They store well in the fridge for make-ahead entertaining, and you can customize them with seasonal colors or toppings. Let’s dive in, and you’ll see how easy elegance can be.
Table of Contents
Table of Contents
what make this Recipe special
I adore Chocolate Covered Pretzel Nests for their quick, take-anywhere charm. They look polished, yet they’re barely a fuss. No oven, no babysitting a stove. I can melt, scoop, and shape in minutes. They chill fast and travel well for parties.
Salted pretzels provide satisfying crunch without extra work. I can swap toppings to match holidays or moods. Minimal equipment keeps the kitchen calm. That means less cleanup and more time for what matters.
I stash in the fridge to be ready for last-minute guests. The glossy chocolate stays shiny, and the flavors marry beautifully.
This simple dessert earns compliments without stealing your evening.
Ingredients (Note: 150 words)
I’m keeping this lineup simple and forgiving. The mini pretzel sticks give the nest its crunch and salty punch. Crushing them lightly helps them cling to the melted base, forming sturdy nests. I favor a mix of semi-sweet and milk chocolate for depth. A touch of coconut oil keeps the gloss shiny.
Pastel candy eggs bring color and a gentle sweetness that kids adore. For dairy-free guests, swap in dairy-free chocolate and plant-based eggs; the look stays festive and bright. A hint of green-tinted shredded coconut creates that grassy nest vibe, if you want it.
Keep everything within reach on the counter to speed assembly. You can adjust quantities to fit your pan or crowd. Small tweaks yield big smiles.
Ingredient overview
- 2 cups mini pretzel sticks, lightly crushed
- 1 1/2 cups semi-sweet chocolate chips
- 1 cup milk chocolate chips
- 1 tbsp coconut oil or butter
- 1 cup pastel candy-coated chocolate eggs
- Optional: shredded coconut tinted green for grass effect
How to Make Chocolate Covered Pretzel Nests
Step 1: Prepare and melt
First, line a parchment-lined sheet. In a microwave-safe bowl, combine semi-sweet chips, milk chocolate, and coconut oil. Heat in 30-second bursts, stirring until smooth.
Step 2: Coat pretzels
Next, gently fold the lightly crushed pretzels into the melted chocolate until coated. The goal is even coating with some crunch still visible. Spoon about 2 tablespoons of the mixture onto the parchment for each nest.
Step 3: Shape nests
Using the back of a spoon, shape each mound into a nest by creating a small indentation in the center. This little well will cradle the candy eggs later. If the chocolate starts to set, give it a 5-second warm-up to soften.
Step 4: Fill with candy eggs
While the chocolate is still smooth, press 2–3 pastel eggs into the center of each nest. If you want a grassy look, sprinkle a pinch of green-tinted coconut in the indentation. I like to keep a few extra eggs nearby for a quick batch of deconstructed bites.
Step 5: Chill and serve
Refrigerate the nests for 20–30 minutes until fully set. Then gently lift them from the parchment and arrange on a serving platter. These Chocolate Covered Pretzel Nests are ready to chill and serve.
Tips for Success
These quick tips keep my Chocolate Covered Pretzel Nests looking glossy and tasting great, even on busy days.
- Chill time helps sets quickly; use a quick freezer chill if you’re in a rush.
- Use a cookie scoop or two tablespoons for evenly sized nests.
- Have candy eggs ready and space your nests on parchment for smooth shifting.
- If chocolate thickens, warm in 5–10 second bursts to keep a glossy finish.
- Store leftovers in an airtight container in the fridge up to 3 days.
Equipment Needed
I keep a microwave-safe bowl for melting chocolate on the counter.
A parchment-lined baking sheet, a spatula, and a spoon handle the rest.
These basics stay ready for a quick dessert turnaround.
- Microwave-safe bowl for melting chocolate
- Parchment-lined baking sheet
- Spatula or spoon for folding pretzels
- Cookie scoop (optional)
- Small piping or spoon for nesting impression

Variations
Here are my favorite twists for Chocolate Covered Pretzel Nests.
- Swap in white chocolate or a mix of chocolates for color. It brightens the tray and pleases color lovers.
- Use dark chocolate for a deeper, richer bite. The deeper bite pairs with the salty crunch beautifully.
- Add minced nuts like pistachios or almonds for texture. Pistachios give a fresh green pop, almonds add crunch.
- Substitute candy eggs with dried fruit or mini candies. Choose tart cherries or pineapple for a zing.
- Tint shredded coconut with food coloring for spring looks. Goal: subtle color without overpowering chocolate.
These tweaks let me tailor nests to tastes and occasions.
I love how color changes the vibe on the dessert table.
Why You’ll Love This Chocolate Covered Pretzel Nests
I love how Chocolate Covered Pretzel Nests come together in a flash, with no oven and no fuss. It’s a speedy, kid-friendly no-bake dessert that still looks polished on dessert tables. The salty crunch from pretzels and the glossy chocolate sing together in every bite, pleasing grownups and little tasters alike. With tools and ingredients, it fits into hectic weeks and last-minute entertaining without cramping style or time to enjoy.
Serving Suggestions
I love placing these Chocolate Covered Pretzel Nests on pastel napkins for spring gatherings or Easter desserts; they look whimsical and feel special without extra effort.
Pair them with a light coffee or sparkling citrus for a playful table.
For a centerpiece, arrange nests on a tray and sprinkle grassy coconut.
Make-Ahead Magic for Chocolate Covered Pretzel Nests
Make-Ahead Magic makes entertaining easy.
I love prepping Chocolate Covered Pretzel Nests in advance.
It keeps weeknights calm and dessert tables sparkling.
Assemble and chill the nests ahead of time.
Store them in an airtight container in the fridge for up to three days.
When you need them, they come out glossy and ready to plate.
For longer storage, freeze unassembled Chocolate Covered Pretzel Nests components.
Pretzels and melted chocolate can be frozen separately.
Reassemble and chill when you want to serve.
For gifting, place nests in clear treat bags with a ribbon.
Add a tiny card to explain the salty-sweet combo.
It makes a charming, hand-touched gift.
If you’re hosting a brunch or Easter spread, these nests shine on display.
Prepare the nests a day ahead, then arrange them just before guests arrive.
I like to pair Chocolate Covered Pretzel Nests with mint sprigs and pastel napkins for spring vibes.
FAQs
Can I substitute white chocolate or use a mix of chocolates?
Yes. I love mixing white chocolate with milk or dark to create a bright, creamy look. If you choose white chocolate, add a splash of almond or vanilla extract to deepen flavor and help it melt smoothly.
How should I store leftovers?
Keep nests in an airtight container in the fridge for up to 3 days. For best texture, wait to add decorative toppings until just before serving.
Can I freeze the nests?
You can freeze unassembled components (pretzel pieces and melted chocolate) separately, then reassemble and chill when ready to serve. Fully assembled nests can become fragile after freezing, so handle gently.
Are there good substitutions for dietary needs?
Yes. Use dairy-free chocolate with coconut oil, and swap candy eggs with dried fruits or seed snacks for nut-free or vegan-friendly options.

Final Thoughts
Chocolate Covered Pretzel Nests prove that simple desserts can sparkle. I love how this no-bake recipe stays cool in warm kitchens and travels well for parties or school events.
With a little imagination, they adapt to any season or crowd. I stash a batch for rushed weekdays and occasional gifts, because they’re quick, friendly, and crowd-pleasing. The magic is in the glossy chocolate, the salty crunch, and the playful nests that say you cared without spending hours in the kitchen. Enjoy crafting, sharing, and savoring these treats with your family and friends.
A plateful sparks smiles and quick memories.
Print
Chocolate Covered Pretzel Nests Are 5-Minute Epic Bold Zest.
- Total Time: 45 minutes
- Yield: 12 nests 1x
- Diet: Vegetarian
Description
Chocolate Covered Pretzel Nests are a quick, no-bake treat that pairs salty pretzels with glossy melted chocolate to form adorable nest shapes. Filled with pastel candy eggs, they make a charming Easter or spring dessert. Ready in minutes and kid-friendly to assemble, these nests store well in the fridge for make-ahead entertaining and wipe-clean sharing on festive dessert tables. They’re fun to customize with extra toppings or seasonal colors for gifts.
Ingredients
- 2 cups mini pretzel sticks, lightly crushed
- 1 1/2 cups semi-sweet chocolate chips
- 1 cup milk chocolate chips
- 1 tbsp coconut oil or butter
- 1 cup pastel candy-coated chocolate eggs
- Optional: shredded coconut tinted green for grass effect
Instructions
- Line a baking sheet with parchment paper.
- In a microwave-safe bowl, combine semi-sweet chocolate chips, milk chocolate chips, and coconut oil. Microwave in 30-second intervals, stirring between each, until smooth and fully melted.
- Gently fold the crushed pretzels into the melted chocolate until evenly coated.
- Scoop about 2 tablespoons of the mixture onto the prepared baking sheet.
- Using the back of a spoon, shape each mound into a nest by creating a small indentation in the center.
- If using, sprinkle a little green-tinted coconut into the center for a grass look.
- While the chocolate is still soft, place 2–3 candy eggs in the center of each nest.
- Refrigerate for 20–30 minutes, or until fully set.
- Once firm, gently remove from parchment and serve.
Notes
- Chilling time helps set the nests firmly; you can speed this with a quick freezer chill.
- Use a cookie scoop for evenly sized nests.
- Store leftovers in an airtight container in the fridge for up to 3 days.
- Swap in white chocolate or mix of chocolates for color variation.
- Prep Time: 15 minutes
- Cook Time: 0 minutes
- Category: Dessert
- Method: No-Bake
- Cuisine: American
Nutrition
- Serving Size: 1 nest
- Calories: 210
- Sugar: 20 g
- Sodium: 120 mg
- Fat: 12 g
- Saturated Fat: 7 g
- Unsaturated Fat: 4 g
- Trans Fat: 0 g
- Carbohydrates: 28 g
- Fiber: 1 g
- Protein: 3 g
- Cholesterol: 5 mg
Keywords: Chocolate Covered Pretzel Nests, Easter dessert, no-bake treats, pretzel nests, candy eggs, kid-friendly dessert