
Homemade Twinkies have long been my go-to comfort treat on a busy week. I’ve learned that nostalgia can bloom from simple, reliable steps. As a chef who loves practical, delicious baking that fits a hectic schedule, I crafted this version to be approachable for home cooks—especially busy moms and professionals. This hook leans on my kitchen-tested methods and pantry-friendly ingredients to deliver eight bite-sized delights in about 30 minutes of hands-on time. You’ll get a tender vanilla sponge, a dreamy marshmallow-vanilla filling, and a perfectly pipeable consistency. The result is bright, comforting, and wonderfully craveable—perfect for lunchboxes, bake sales, weekend baking, or a spontaneous sweet treat.
Table of Contents
what make this Recipe special
Homemade Twinkies have a way of easing the rush of a busy week. I reach for simple, pantry-friendly ingredients and trust the process to deliver nostalgia in eight bites. This version keeps the soft sponge and creamy marshmallow filling you loved as a kid.
What makes it special is the no-fuss approach. The batter comes together in one bowl, the filling pipes smooth, and the eight cakes vanish fast. I love teaching this to busy readers who crave bake-gift confidence, not chaos.
I love that this recipe respects busy rhythms while delivering true joy. The sponge stays forgiving, the filling pipes smoothly, and cleanup is gentle. You’ll taste nostalgia and confidence in your kitchen, day after day.

Homemade Twinkies: Why this version shines
Texture, filling, and overall approach
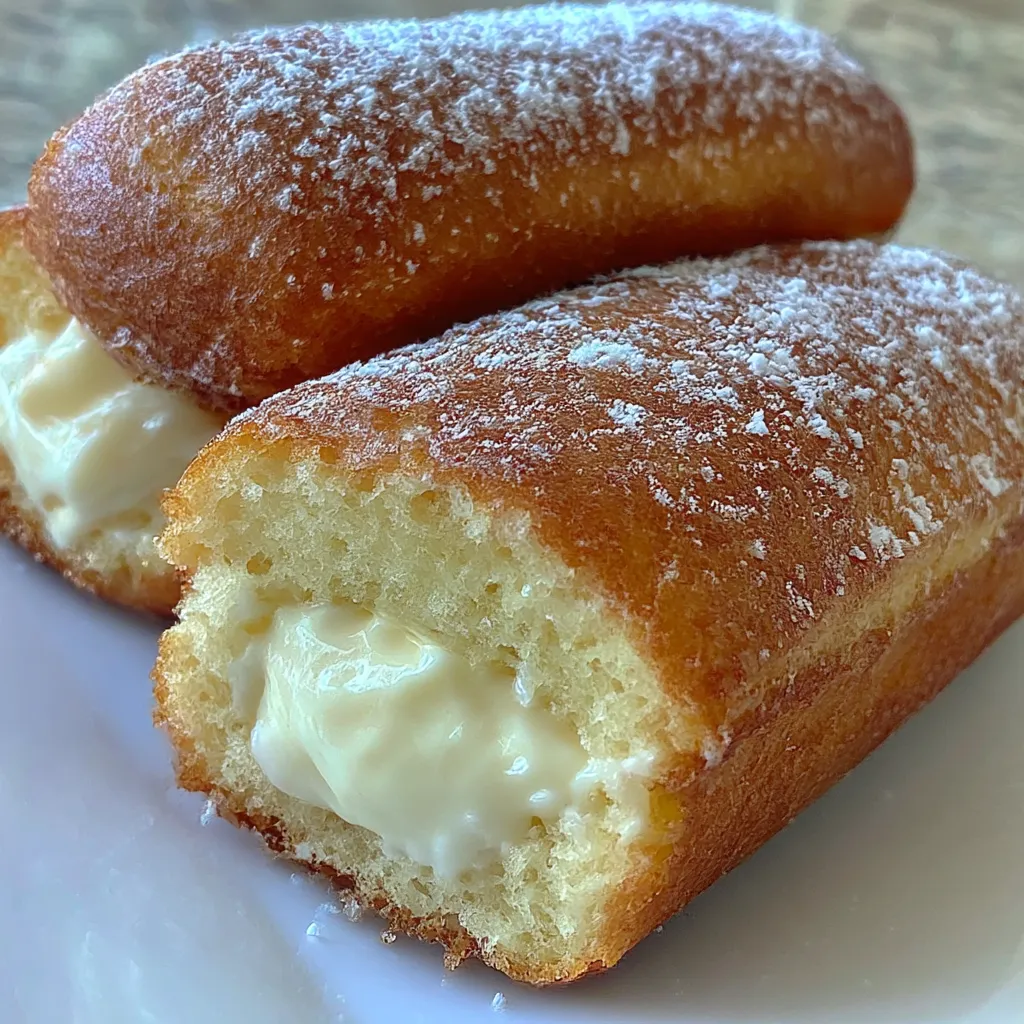
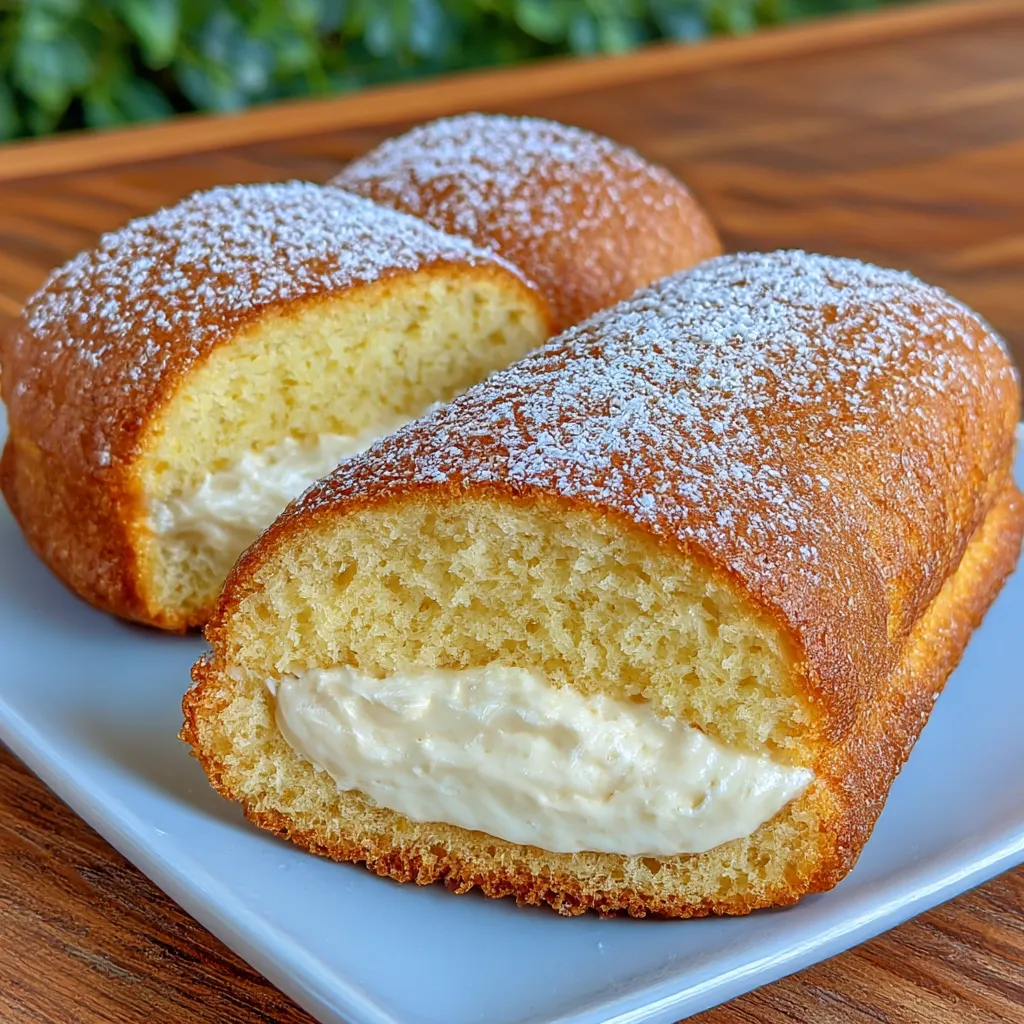
Think tender vanilla sponge with a whisper of vanilla aroma. The filling stays creamy but pipeable, so you can cozy eight little cakes without mess. Best of all, you can rely on pantry staples to deliver bakery-style results.
Practical nostalgia for busy lives
How this recipe fits a hectic schedule
Prep is quick, clean, and forgiving. One-bowl mixing keeps cleanup gentle. And the bite-sized cakes stash easy for lunches, meetings, and after-school snacks.
Ingredients
I keep these ingredients on hand for Homemade Twinkies, a nostalgic treat I reach for when I want comfort without chaos.
Exact quantities appear at the bottom of the article for printing, so you can shop once and bake later.
Sponge batter components
1 cup all-purpose flour
Provides the structure and a tender crumb for the sponge.
1 tsp baking powder
Helps the batter rise to create a light, airy cake.
¼ tsp salt
Enhances sweetness and rounds vanilla notes.
2 large eggs
Bind and enrich the batter for a soft, cohesive texture.
¾ cup granulated sugar
Adds sweetness and helps the crumb stay tender as it bakes.
¼ cup unsalted butter, melted
Contributes richness and a silky crumb.
¼ cup milk
Moistens the batter so it bakes up moist and even.
1 tsp vanilla extract
Gives the sponge its warm, familiar aroma.
Creamy marshmallow filling components
½ cup unsalted butter, softened
Base for a creamy, pipeable filling with body.
1 cup powdered sugar
Sweetens smoothly without gritty texture.
1 cup marshmallow creme
Creates that classic, marshmallowy center you crave.
1 tsp vanilla extract
Brightens the filling and deepens flavor.
1–2 tbsp milk, as needed
Adjusts the filling to a pipeable, dreamy consistency.
Substitutions and notes
Optional flavors
Vanilla bean, lemon zest, or almond extract can lift the sponge aroma.
Dairy-free or vegan options for filling
Use dairy-free butter and plant-based milk; consider vegan marshmallow creme if needed.
Tips for printable bottom-quantity listing
Exact quantities appear at bottom for an easy, printer-friendly version.
How to Make Homemade Twinkies
Step 1: Preheat, prep pans, and gather dry ingredients
First, preheat the oven to 350°F (175°C). Then grease and lightly flour a Twinkie-style pan or mini loaf pan. Whisk the dry ingredients (flour, baking powder, salt) in a separate bowl.
Step 2: Make the batter
Beat eggs and sugar until light and fluffy. Next, stir in melted butter, milk, and vanilla until smooth. Finally, fold in dry ingredients until just combined.
Step 3: Bake and cool
Next, spoon batter into cavities about ¾ full. Then bake 12–15 minutes until lightly golden and a toothpick comes out clean. Allow cakes to cool completely before filling.
Step 4: Prepare the marshmallow filling
Then beat softened butter until creamy. Next, add powdered sugar, marshmallow creme, and vanilla. Finally, add enough milk to achieve a smooth, pipeable texture.
Step 5: Fill and assemble
Finally, transfer filling to a piping bag. Insert the tip into the bottom of each cake. Pipe filling inside, creating a generous center without bursting the cake.
Tips for Success
Quick tips for smooth results
Use room-temperature butter for the filling to ensure creamy texture and smooth, easy piping every time.
Don’t overmix the batter after adding dry ingredients to keep the crumb tender, light, and moist.
Chill the filling briefly so it holds a steady pipe and won’t squish into a wall of sweetness.
Let baked cakes cool completely before filling to preserve structure and prevent filling from tearing delicate crumb.
Have piping tips ready and clean, with a steady hand to achieve clean seams every time.
Equipment Needed
Essential tools
Twinkie-style pan; mini loaf pan (or silicone molds)
Mixing bowls; or a large and a small bowl
Electric mixer or whisk; hand whisk works
Spatulas; wooden spoon works well
Piping bag with small tip; or resealable bag
Cooling rack; or a clean tray
Oven thermometer (optional); rely on your gauge
Homemade Twinkies Variations
These twists keep Homemade Twinkies nostalgia alive, fitting different tastes or diets.
Flavor and dietary ideas
Vanilla bean or lemon zest in sponge for brighter aroma
I love scratching vanilla bean seeds into the batter for a lush perfume. A 1/2 teaspoon lemon zest brightens the crumb without overpowering sweetness.
Chocolate or coffee variation in the sponge
Replace 2 tablespoons of flour with cocoa powder, plus 1/2 teaspoon espresso powder.
Dairy-free filling using vegan butter and almond milk
Swap in vegan butter and almond milk to keep the filling silky. If needed, use a dairy-free marshmallow creme.
Gluten-free option using a 1-to-1 GF flour blend
Use a 1-to-1 gluten-free flour blend. You may need a touch more milk to keep batter moist.
Why You’ll Love This Homemade Twinkies
Homemade Twinkies are the little hugs I reach for when the week feels chaotic. They’re quick, forgiving, and genuinely nostalgic, with a tender sponge and dreamy filling that never scraps the joy. The batch makes eight bite-sized treats, perfect for school lunches, meetings, or bake sales. Best of all, they come together fast, so I can feed craving-level sweetness without derailing a busy evening. It’s a small joy that travels well, too.
A dessert that travels well and pleases a crowd
Quick to assemble on weeknights, fun for kids’ lunches, and reliable for bake sales
Serving Suggestions
These Homemade Twinkies shine with simple pairings that lift the sweetness. I love easy, crowd-pleasing options that travel well.
Pairings and presentation
Serve with cold milk, coffee, or a light fruit salad
Dust with cocoa powder for a neat, inviting finish
Present on a simple platter or in mini treat boxes for sharing
Make-Ahead and Storage for Homemade Twinkies
Make-ahead and storage tips
Bake and cool the cakes up to a day ahead.
For Homemade Twinkies, this keeps your week smooth.
Fill just before serving for best texture.
Store unfilling cakes in an airtight container for up to 2 days.
Refrigerate filled cakes for up to 3 days.
Keep them away from strong odors.
Freeze unfilled cakes for longer storage; thaw before filling.
Thaw in the fridge for even texture.
Fill and serve within a day.
FAQs
Can I freeze Homemade Twinkies?
Yes—freeze unfilled Homemade Twinkies wrapped well for up to two months. Thaw before filling and serve within a day or two.
Can I make the filling dairy-free or vegan?
Absolutely—swap in dairy-free butter and a plant-based milk to achieve a smooth, pipeable texture. For best results, try vegan marshmallow creme or a homemade alternative for a similar creaminess.
Are there substitutions for the sponge ingredients if I’m gluten-free?
Use a 1-to-1 gluten-free flour blend and ensure the baking powder is gluten-free. The rest of the sponge recipe works with minor adjustments to liquid if needed.
What’s the best way to pipe the filling?
Use a small round piping tip or a decorative tip. Chill the filling briefly, fill the bag, and insert into the bottom of each cake for a clean, even pipe.
Making Homemade Twinkies reminded me why baking matters to busy families. I feel comfort when the vanilla scent fills the kitchen. This small project fits into hectic weeks and still delivers nostalgia. The tender sponge and creamy center come together with gentle rhythm, not stress. I love how simple ingredients become a bakery-style treat at home. Sharing eight bite-sized joys makes weeknights brighter and lunchboxes friendlier. Nostalgia meets practicality, and that combo feels like a warm hug. I’ll bake these again next weekend, knowing they travel and spark smiles today. Joy, nourishment, and a kitchen of memories—that’s why I bake.
Print
Homemade Twinkies offer 8 easy, delicious, foolproof bites.
- Total Time: 30 minutes
- Yield: 8 cakes 1x
- Diet: Vegetarian
Description
Homemade Twinkies: Soft, fluffy vanilla sponge cakes filled with a creamy marshmallow-vanilla filling, recreating the nostalgic snack at home with fresher ingredients. This easy recipe yields eight bite-sized cakes, perfect for lunchboxes, bake sales, or weekend baking. Simple pantry staples, tender crumb, and a dreamy pipeable filling make these treats indulgent yet approachable for home bakers.
Ingredients
- 1 cup all-purpose flour
- 1 tsp baking powder
- ¼ tsp salt
- 2 large eggs
- ¾ cup granulated sugar
- ¼ cup unsalted butter, melted
- ¼ cup milk
- 1 tsp vanilla extract
For the filling:
- ½ cup unsalted butter, softened
- 1 cup powdered sugar
- 1 cup marshmallow creme
- 1 tsp vanilla extract
- 1–2 tbsp milk, as needed
Instructions
- Preheat oven to 350°F (175°C). Grease and lightly flour a Twinkie-style pan or mini loaf pan.
- In a bowl, whisk together flour, baking powder, and salt.
- In a separate bowl, beat eggs and sugar until light and fluffy.
- Mix in melted butter, milk, and vanilla extract until smooth.
- Gradually fold the dry ingredients into the wet mixture until just combined.
- Spoon batter into prepared pan, filling each cavity about ¾ full.
- Bake for 12–15 minutes, or until lightly golden and a toothpick inserted comes out clean. Let cool completely.
- For the filling, beat softened butter until creamy. Add powdered sugar, marshmallow creme, and vanilla extract. Beat until fluffy. Add milk as needed for a smooth, pipeable texture.
- Transfer filling to a piping bag. Insert the tip into the bottom of each cake and gently pipe filling inside.
Notes
- Cool cakes completely before filling to avoid melting the filling.
- Chill the filling briefly for easier piping.
- Store refrigerated in an airtight container for up to 3 days; freeze for longer storage.
- Prep Time: 15 minutes
- Cook Time: 15 minutes
- Category: Dessert
- Method: Bake
- Cuisine: American
Nutrition
- Serving Size: 1 Twinkie
- Calories: 480
- Sugar: 45 g
- Sodium: 200 mg
- Fat: 28 g
- Saturated Fat: 17 g
- Unsaturated Fat: 9 g
- Trans Fat: 0 g
- Carbohydrates: 48 g
- Fiber: 1 g
- Protein: 6 g
- Cholesterol: 95 mg
Keywords: Homemade Twinkies, Twinkies recipe, cream-filled cake, nostalgic snack, vanilla sponge, marshmallow filling