
Stained Glass Cookies are not just treats; they’re edible windows to holiday memories.
I’m a chef behind Meal Prep Ideas.
I craft practical, crowd-pleasing recipes for busy women balancing work, home, and life.
This stained glass cookies recipe uses butter-rich shortbread.
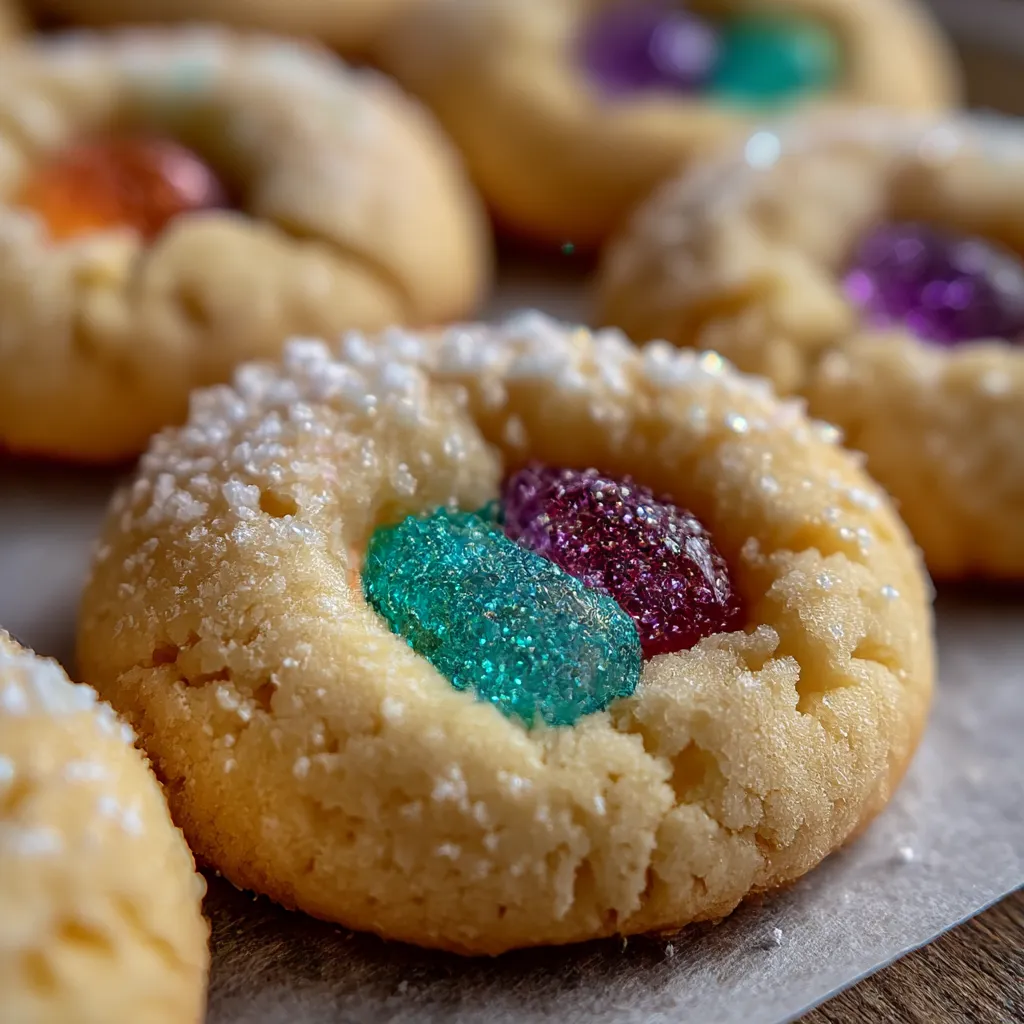
Crushed hard candies form jewel-toned centers.
They melt into shimmering panes as they bake.
It’s approachable for weeknights, yet dazzling for gifting, parties, or a weekend baking project with family.
You’ll find pantry-friendly ingredients, simple steps, and tips to tailor shapes and colors for any season.
Let’s turn simple ingredients into sparkle, shareable moments you’ll savor and remember.
Table of Contents
Stained Glass Cookies: what makes this recipe special
Stained Glass Cookies are more than pretty; they’re edible windows to memories.
They combine a butter-rich dough with candy centers that melt into jewel-like panes.
I love how a simple roll-out brings party-worthy sparkle with weeknight ease.
The art and the ease
I love that the art lies in color and cut, not skill.
I reuse simple shapes to create windows that shimmer as they bake.
The dough chills easily, keeping chaos at bay when time is short.
Why busy households love it
Busy households love it because I can prep ahead.
I find the dough forgiving, and candy centers brighten any plate.
Plus, my kids enjoy picking colors, turning baking into a mini party.
Ingredients for Stained Glass Cookies
For Stained Glass Cookies, here’s the essential pantry lineup. I love how simple ingredients become jewel-toned centers.
Quick reference for the pantry
- 2¼ cups all-purpose flour
- ½ tsp baking powder
- ¼ tsp salt
- ¾ cup unsalted butter, softened
- 1 cup granulated sugar
- 1 large egg
- 1 tsp vanilla extract
- Assorted hard candies, crushed
- Optional: powdered sugar for dusting
- Substitution: salted butter; add ¼ tsp extra salt
Exact quantities for Stained Glass Cookies are at the bottom and printable.
Keep this stash handy for quick holiday moments.
How to Make Stained Glass Cookies
Step 1 — Make the dough
I start by whisking the dry ingredients: 2¼ cups flour, ½ tsp baking powder, and ¼ tsp salt.
In a separate bowl, I cream ¾ cup unsalted butter with 1 cup sugar until light and fluffy.
I beat in 1 large egg and 1 tsp vanilla, then slowly mix in the dry ingredients until a smooth dough forms.
This butter-rich base becomes the foundation for our Stained Glass Cookies, ready to shine once the candy centers melt.
Step 2 — Chill the dough
I divide the dough in two, wrap it tight, and chill for about an hour.
Chilling keeps the slices neat and makes cutting easier, keeping the windows crisp when they bake.

Step 3 — Roll, cut, and create the center window
On a lightly floured surface, I roll the dough to about ¼-inch thickness.
I cut a large shape, then pop a smaller cutout from the center to form the window frame.
Step 4 — Fill centers with crushed candy
Place the cookies on a parchment-lined sheet and fill the center cutouts with crushed hard candies.
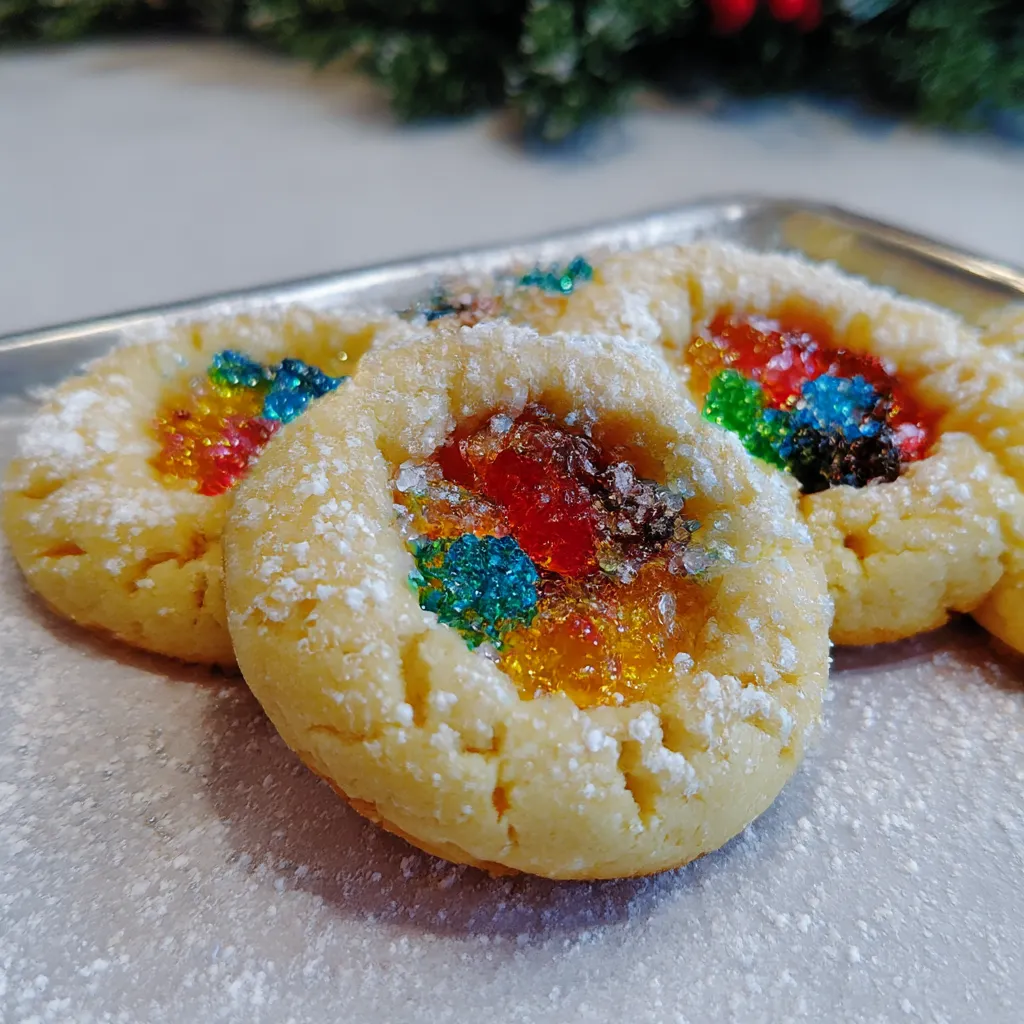
The candy centers will melt into jewel-toned panes as the cookies bake, revealing the stained glass effect.
Step 5 — Bake until candy melts and edges golden
Preheat to 350°F (175°C) and bake for 10–12 minutes, until edges are lightly golden and centers are melted.
Let the cookies rest on the sheet for a minute, then transfer to a rack to cool completely.
Step 6 — Cool and lift carefully
Cool completely before lifting with a spatula. The candy centers set as glossy windows that gleam with color.
Troubleshooting tiny centers
If centers stay opaque or don’t melt fully, return the cookies to the oven for 1–2 minutes in small increments, watching closely.
Quick tips for even candy melt
Crush candies finely for uniform melt. Don’t overfill; a thin layer yields cleaner panes. If pooling occurs, reline the sheet and retry with a fresh batch.
Stained Glass Cookies: Tips for Success
Dough and rolling tips
- Chill the dough for an hour; it keeps shapes crisp and minimizes spreading.
- Roll to ¼ inch thick for even baking and pretty panes.
- Lightly flour the surface; re-roll scraps once to avoid tough edges.
Center candy tips
- Crush candies finely for even melt; pulse in short bursts.
- Don’t overfill centers; a thin layer yields cleaner panes.
- If centers stay opaque, bake 1–2 more minutes in short bursts.
- Fruit-flavored candies give vibrant hues and melt best.
Equipment Needed for Stained Glass Cookies
Must-have tools
- Rolling pin, about 12 inches
- Large cookie cutter plus a center-cut mini cutter
- Parchment paper or silicone baking mat
- Two baking sheets and a cooling rack
- Spatula and a thin offset spatula
- Measuring cups and spoons
Substitutes and low-budget options
- Silicone mat or foil-lined tray instead of parchment
- Inexpensive plastic cutters; use lids or bottle caps for centers
- Rolling-pin substitute: a clean bottle or glass
- Use a basic measuring set; skip extra gadgets
Variations
Flavor and color variations
- Add 1–2 teaspoons citrus zest to the dough for bright, sunny notes.
- Swap vanilla for almond or peppermint extract for a new twist.
- Split the dough and tint each portion a different color for rainbow panes.
- Mix crushed fruit candies to create layered, jewel-toned centers.
- Dust dough with cocoa powder for chocolate-stained panes and berry centers.
- Glitter the centers with a pinch of edible gold or silver dust.
- Use seasonal shapes and colors to match holidays or celebrations.
- Experiment with peppermint bark or cranberry candies for winter flair.
Dietary adaptations
- Gluten-free: use a 1-to-1 gluten-free flour blend plus ¼ tsp xanthan gum if needed.
- Egg-free: replace the egg with a flax egg or applesauce for binding.
- Dairy-free/vegan: substitute dairy-free butter; choose vegan, meltable candies.
- Low-sugar: select sugar-free or naturally sweetened candies that melt well in centers.
- Nut-free: verify candy ingredients to avoid cross-contact; keep dough nut-free.
Why You’ll Love Stained Glass Cookies
I smile every time I bake Stained Glass Cookies. They pair a butter-rich dough with jewel-toned candy centers, turning a simple batch into edible windows of celebration. As a busy cook, I love their sparkle without a long to-do list. They taste like sunshine, brighten any plate, and bring the family together in minutes. Plus, they’re forgiving, easy to customize, and perfect for gifting.
A showpiece that’s easy to love
Stained Glass Cookies look like a showpiece, but they’re really friendly to bake. The melted candy centers glow from within, catching kitchen light as they cool. I love how a simple dough and crushed candies create a wow moment, with minimal effort. They’re sturdy for gifting and fun to customize with color.
Quick-to-bake crowd-pleasers
Quick to bake, these cookies slide from tray to table in minutes. A 10–12 minute bake per sheet keeps the kitchen calm, not chaotic. Prep is simple: mix butter, sugar, egg, and vanilla, then roll and cut. They freeze well before baking, so you can stock up for busy weeks. Kids and guests adore the candy centers and color pops.
Serving Suggestions for Stained Glass Cookies
- Plate them on a chilled white platter to let colors pop.
- Pair with warm drinks like cinnamon tea or espresso.
- Serve with a lemon yogurt dip for brightness.
- Gift a cookie tin with a ribbon for gifting.
I love how a simple platter and ribbon turn cookies into celebrations.
Decorating and Gift Ideas to Elevate Stained Glass Cookies
Decorating Stained Glass Cookies is my favorite way to personalize a batch. A simple glaze, ribbons, and color spark a festive mood. It feels like gifting tiny sunshine.
Seasonal decorating ideas
- Dust with powdered sugar and edible glitter for a starry finish.
- Shade edges with a light cocoa dust for contrast panes.
- Tint dough in seasonal hues for rainbow panes.
Gift-ready packaging tips
- Wrap cookies in clear cellophane bags and tie with ribbon.
- Layer in a decorative tin with parchment between cookies.
- Slip in a note with serving ideas and color tips.
FAQs
Can I make the dough ahead of time?
Yes. I often prep Stained Glass Cookies dough a day or two ahead; wrap tightly and refrigerate for up to 3 days. For longer storage, I freeze the dough in a disc or log, then thaw in the fridge before rolling. The dough is forgiving, and chilling helps keep those windows crisp when you bake.
Can I freeze the shaped cookies before baking?
Yes. After shaping the cookies with the center window filled, I arrange them on a sheet and freeze until solid, then transfer to an airtight bag. I bake them from frozen; add about 2–3 minutes to the bake time, and watch for melted centers and golden edges.
Are other candies okay for the centers?
Fruit-flavored hard candies work best for vibrant centers, and I like to experiment with other hard candies too. I crush finely, avoid chewy or gummy candies that won’t melt evenly, and keep centers thin for clean panes. For best results with Stained Glass Cookies, use candy that melts smoothly and colors your panes brightly.
What if candy centers won’t melt completely?
When centers won’t melt, I bake in short bursts, 1–2 minutes at a time, until centers melt and the panes look glossy. I check that the candy is crushed finely and the dough isn’t too thick; if needed, I re-roll and refill with fresh candy before baking again.
Final Thoughts
Stained Glass Cookies bring warmth, color, and a spark of celebration to any gathering. I love how a simple dough and crushed candies become edible art that fits a busy schedule. They’re forgiving, quick to bake, and perfect for gifting or weekend family projects. When I pull a tray from the oven, the kitchen smells like happiness, and those jewel-toned centers glow like tiny windows of sunshine.
With a little color and creativity, this recipe stays flexible for holidays or weeknights. I’ve watched families create memories around a tray, turning chaos into celebration. Stained Glass Cookies prove simple can shine.
Print
Stained Glass Cookies bring 20 bold tasty festive bites.
- Total Time: 2 hours 10 minutes
- Yield: 20 cookies 1x
- Diet: Vegetarian
Description
Stained Glass Cookies are artful, buttery sugar cookies with jewel-like candy centers that melt into vibrant panes of color. This festive treat pairs a classic shortbread-like dough with crushed hard candies, creating sparkling, see-through centers perfect for holidays and celebrations. Easy to assemble with simple pantry ingredients, these cookies bake into eye-catching windows, ideal for gifting, parties, and making memories with family and friends. Yields about 20 cookies.
Ingredients
- 2½ cups all-purpose flour
- ½ tsp baking powder
- ¼ tsp salt
- ¾ cup unsalted butter, softened
- 1 cup granulated sugar
- 1 large egg
- 1 tsp vanilla extract
- Assorted hard candies, crushed (fruit flavors work best)
- Optional: powdered sugar for dusting
Instructions
- In a bowl, whisk together flour, baking powder, and salt.
- In a separate bowl, cream butter and sugar until light and fluffy. Beat in egg and vanilla extract.
- Gradually add dry ingredients and mix until a smooth dough forms.
- Divide dough in half, wrap, and chill for 1 hour.
- Preheat oven to 350°F (175°C). Roll dough to about ¼-inch thickness on a floured surface.
- Cut cookies with a large cutter, then cut a smaller shape from the center.
- Place cookies on a parchment-lined baking sheet and fill centers with crushed candy.
- Bake for 10–12 minutes until edges are lightly golden and candy is fully melted.
- Cool completely before removing from the baking sheet.
Notes
- Use fruit-flavored candies for vibrant centers.
- If centers don’t melt completely, return to oven for an extra minute or two in small increments.
- Dust with powdered sugar for a delicate finish if desired.
- Store in an airtight container at room temperature for up to 5 days.
- Get creative with shapes and cutters for year-round variations.
- Prep Time: 30 minutes
- Cook Time: 10–12 minutes
- Category: Cookies
- Method: Baking
- Cuisine: American
Nutrition
- Serving Size: 1 cookie
- Calories: ~180
- Sugar: 15 g
- Sodium: 120 mg
- Fat: 9 g
- Saturated Fat: 6 g
- Unsaturated Fat: 2 g
- Trans Fat: 0 g
- Carbohydrates: 22 g
- Fiber: 1 g
- Protein: 2 g
- Cholesterol: 9 mg
Keywords: Stained Glass Cookies, stained glass cookie recipe, candy center cookies, festive cookies, holiday baking, colorful cookies, easy dessert, family-friendly cookies, party treats